How to Check PDF Bleed Box on Windows: Acrobat, Edge, and Press-Ready Edge Checks Before You Print or Send to Press
To check PDF bleed box on Windows, save the real PDF in File Explorer, open a page-box-aware properties workflow, and compare the bleed box with the trim box so you know whether artwork really extends past the final cut line.
If backgrounds, photos, or borders stop at trim instead of extending into bleed, fix that before you print, upload to a print portal, or send the file to a press so the finished piece does not show white slivers at the edge.
On Windows, bleed problems are easy to miss because the preview often looks calmer than the production reality. A PDF opens neatly in Edge or Acrobat, sits in Downloads looking ready to go, and only causes trouble after the file reaches a print shop, a cutting workflow, or a proofing step. A bleed-box check is the fast way to separate looks fine on my screen from will still look right after trimming.
Fastest practical path: save the exact Windows copy, compare bleed against trim, confirm whether the artwork really extends beyond the cut line on the edges that matter, then decide whether the file needs a re-export, a small cleanup, or no change at all.
In a hurry? Jump to quick start: check PDF bleed box on Windows in about 5 minutes.
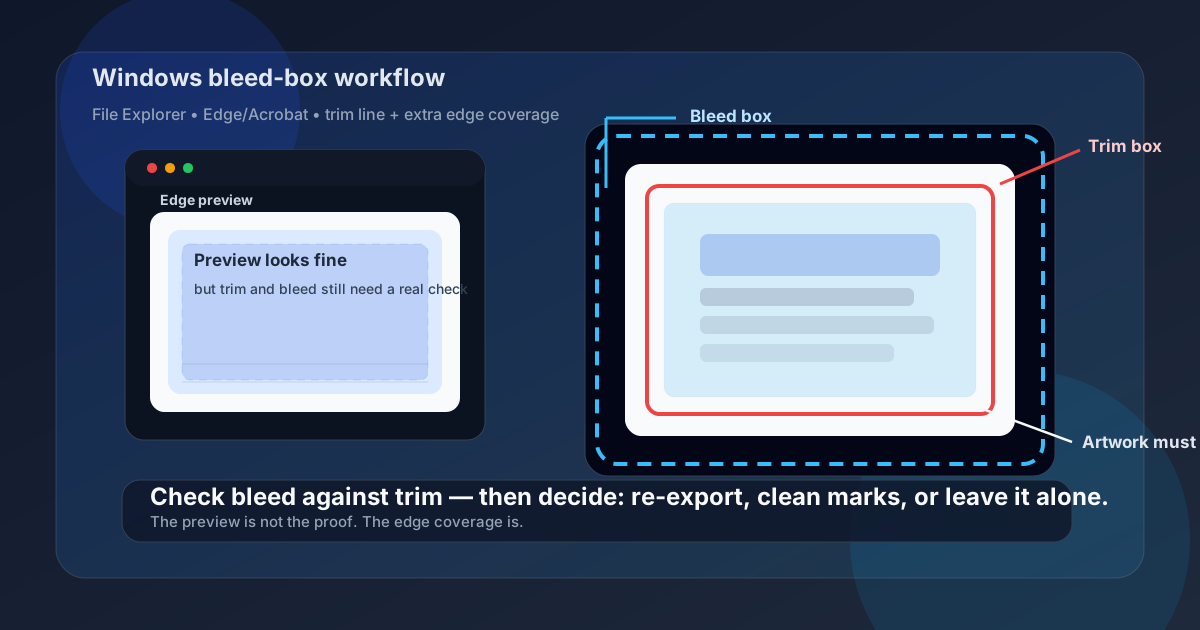
Table of contents
- Quick start: check PDF bleed box on Windows in about 5 minutes
- What a bleed box really means on Windows
- Why Windows previews can hide bleed problems
- Step-by-step: how to review PDF bleed box on Windows
- When bleed matters and when it does not
- When to re-export, clean up, or leave the PDF alone
- Related LifetimePDF tools and guides
- FAQ
Quick start: check PDF bleed box on Windows in about 5 minutes
If your real goal is simply confirm whether this Windows PDF has enough safe edge coverage before it gets printed or cut, use this order:
- Save the exact PDF you plan to print, upload, email, or send to a print shop into a normal local Windows folder.
- Do not assume the preview in Edge, Acrobat, Outlook, Teams, or a browser tab proves the file is production-ready.
- Open a page-box-aware workflow such as View PDF Properties so you can read the bleed box and trim box clearly.
- Confirm that any background, photo, border, or color block meant to reach the edge also extends beyond the trim line.
- Check the crop box, media box, and page size if the outer structure still feels odd.
- If the artwork stops at trim, re-export from the source file. If the real problem is only marks or outer clutter, clean that up instead of rebuilding the whole document.
What a bleed box really means on Windows
The bleed box marks the extra outer area meant to carry artwork beyond the final cut size. That extra edge coverage gives printers room to trim through color, photos, or border elements instead of cutting exactly where the visible design ends. When the bleed is healthy, a small cutting shift usually still leaves a clean result. When the bleed is missing or too tight, even a small shift can expose paper at the border.
On Windows, this matters because the same PDF often moves through File Explorer, Edge, Acrobat, print preview, browser-based upload portals, and shared proofing steps before it reaches the press. A file can look finished in those views while still having no usable bleed, uneven bleed, or artwork that stops exactly at trim. Checking the bleed box helps you verify the production reality instead of trusting only the screen.
| Page box | What it usually means | Why a Windows user should care |
|---|---|---|
| Bleed box | The extra area meant to carry artwork beyond the finished cut line | This is the key field when you need to know whether edge-to-edge design can survive trimming without white slivers. |
| Trim box | The intended finished page after cutting | You compare bleed against trim to see whether enough extra artwork exists beyond the final edge. |
| Crop box | The visible page area many viewers respect | Useful when the preview looks neat but you suspect it may be hiding marks, outer clutter, or a misleading presentation. |
| Media box | The full stored page canvas | Helpful when the PDF carries marks, oversized outer space, or other export leftovers that make the production story harder to read. |
Why Windows previews can hide bleed problems
Windows gives you several fast ways to open a PDF, but not every view proves the same thing. Some paths tell you the file opens. Fewer tell you whether the document is actually ready for cutting, press work, or edge-to-edge output.
| Windows path | What it is good for | What it cannot safely prove |
|---|---|---|
| File Explorer and Downloads | Confirming you saved the right outgoing copy and are not still looking at a temporary preview. | Whether the PDF actually includes enough real edge artwork beyond trim. |
| Edge, Acrobat, or browser preview | Quickly opening the file and spotting obvious layout trouble. | Whether bleed, trim, crop, media, and real print intent all agree with each other. |
| Print preview | Seeing whether scaling, borders, or paper choices already look suspicious. | Whether the deeper problem is missing bleed, wrong trim, or a source-file export mistake. |
| Print-shop upload portal | Catching warnings before the final handoff. | You should not rely on the portal as the first place you discover that your edge artwork never extended past trim. |
| Properties-aware page-box review | Giving you the strongest answer before the PDF leaves Windows. | It does not automatically choose re-export versus cleanup for you. It only shows which problem you actually have. |
The easy mistake
People often assume the file must be fine because the preview fills the page cleanly. In reality, a Windows preview can make an edge-to-edge design feel finished even when the artwork stops exactly at trim and the job still lacks safe bleed for cutting.
Step-by-step: how to review PDF bleed box on Windows
This workflow is quick enough for everyday Windows use and practical enough for real print prep.
1) Save the exact Windows copy first
Do not judge only an Outlook preview, Teams attachment, or browser tab if another file is the one really headed to print, a portal, or a press. Start with the actual outgoing PDF in File Explorer.
2) Open a page-box-aware properties view
Use View PDF Properties or a comparable workflow that exposes bleed, trim, crop, and media instead of leaving you to guess from the visible preview.
3) Compare bleed with trim first
This is the core question: does the design really continue past the finished cut line on the edges that are supposed to print to the border?
4) Verify the artwork, not just the numbers
A file can technically define a bleed box and still fail in practice if the actual photo, color block, or border stops too early. Check the real edge content, not only the labels.
5) Check crop, media, and page size if the file still feels odd
If the document carries marks, outer clutter, or strange scaling, compare it with Check PDF Page Boxes and page size on Windows before you fix the wrong layer.
6) Re-export, clean up, or leave it alone deliberately
Re-export when the artwork does not truly extend beyond trim, clean up marks or outer clutter when the structure is fine but the presentation is messy, and stop editing when the current page boxes already fit the real job.
Reliable sequence: save the real Windows copy → read bleed and trim → verify the artwork actually extends → check crop/media/page size only if needed → choose re-export versus cleanup → test one final output.
When bleed matters and when it does not
Bleed is not a universal requirement. It matters most when a printed sheet will be cut down to a finished edge and the design is supposed to run all the way to that edge.
High-priority bleed jobs
Flyers, posters, postcards, business cards, menus, packaging, booklets, inserts, and branded pieces with photos, color, or borders reaching the edge.
Best move: check bleed carefully before the file leaves Windows.
Lower-priority bleed jobs
Screen-only PDFs, contracts, forms, reports, or office documents that already keep comfortable white margins.
Best move: do not chase bleed perfection if the real workflow does not need it.
Important limitation
Bleed does not fix wrong page size, weak image resolution, or missing artwork.
Best move: fix the source issue instead of hoping crop or trim edits will invent missing edge content.
| What you notice | What it usually means | Best next move |
|---|---|---|
| The page is meant to print edge to edge | Bleed probably matters because the cut will not land perfectly every time. | Confirm that backgrounds, photos, or borders really extend past trim on all needed edges. |
| The PDF looks fine on screen but the print shop warns about white edges | The preview may look calm even though the artwork stops at trim or the bleed is uneven. | Check bleed against trim and verify the artwork itself, not just the visible page. |
| The file has crop marks or extra outer clutter | The production setup may be fine, but the outer presentation may still need cleanup. | Compare bleed, trim, crop, and media before using Crop PDF or a marks-removal workflow. |
| The job is a normal office print with white margins | Bleed may not matter at all. | Leave the file alone unless another issue like page size or visible clutter is the real problem. |
When to re-export, clean up, or leave the PDF alone
Most Windows bleed-box decisions come down to three outcomes.
Best decision rule
If the design does not really extend beyond trim, re-export from the source file. If the bleed is healthy but the file carries marks or extra outer clutter, clean that up instead. If the page boxes already match the job, stop editing and ship the PDF.
Re-export
Choose this when the bleed box is missing, too small, or technically present but the real edge artwork still stops at trim.
This is the right fix for missing production content.
Clean up the PDF
Choose this when the document already has workable bleed, but crop marks, outer clutter, or oversized visible framing are making the file harder to use.
This is the right fix for presentation clutter, not missing artwork.
Leave it alone
Choose this when the PDF already matches the real output method and no print-prep issue remains.
Healthy PDFs rarely improve when you keep fixing them.
FAQ
How do I check PDF bleed box on Windows?
Save the PDF locally, open a page-box-aware properties workflow, and compare the bleed box with the trim box so you can confirm whether the design really extends beyond the final cut line.
Can Edge or Acrobat show a bleed box clearly on Windows?
They are useful for opening the exact saved file and spotting obvious issues, but a properties-aware workflow is better when you need the clearest read on bleed, trim, crop, and media relationships.
Is bleed box the same as trim box on Windows?
No. The trim box marks the final finished edge after cutting, while the bleed box extends beyond that line to provide extra artwork the cutter can trim through safely.
Can I fix missing bleed by cropping the PDF on Windows?
Usually no. Cropping can hide marks or extra outer space, but it cannot create missing edge artwork. If the design stops at trim, a better source export is usually the correct fix.
Why does the PDF look fine on Windows but still print with white edges?
Because a Windows preview can look clean even when the file still has no usable bleed, uneven edge coverage, or trim settings that do not match the real job. Checking bleed, trim, crop, and page size together usually reveals the real cause.
Check the edge coverage before the PDF reaches the cutter.
On Windows, the cleanest bleed-box workflow is simple: inspect the real outgoing file, compare bleed against trim, make sure the artwork truly extends beyond the cut line, and fix only the layer that is actually wrong.
Published by LifetimePDF — Pay once. Use forever.