How to Fill Out an Uneditable PDF Form on Chromebook: Fix Scanned, Locked, and Flattened Files Fast
To fill out an uneditable PDF form on Chromebook, save the file from Gmail, Google Drive, or Files, open a browser-based PDF form filler in Chrome, then place text, checkmarks, and signatures directly on top of the page where the original PDF will not let you type.
If the form is scanned, flattened, or locked, the fastest Chromebook workflow is save one clean copy first, fill the content in short passes, sign last, and review the finished PDF before you upload or send it.
That is the answer most people actually need on ChromeOS. The frustration usually starts when the file opens normally in a Gmail preview, a Google Drive viewer, or the Files app, but the cursor never appears where the form expects you to type. Sometimes the PDF came from a school portal, sometimes a scanner flattened the original fields away, and sometimes restrictions are the real issue. The practical fix is not printing, handwriting, and rescanning. It is using a cleaner Chromebook workflow that treats the PDF page as the template and your answers as a precise overlay.
Fastest path: open LifetimePDF's PDF Form Filler in Chrome, upload the PDF from Files, Gmail, or Drive, place your answers where needed, then sign and save the finished copy on your Chromebook.
In a hurry? Jump to Quick start: fill an uneditable PDF on Chromebook in 3 minutes.
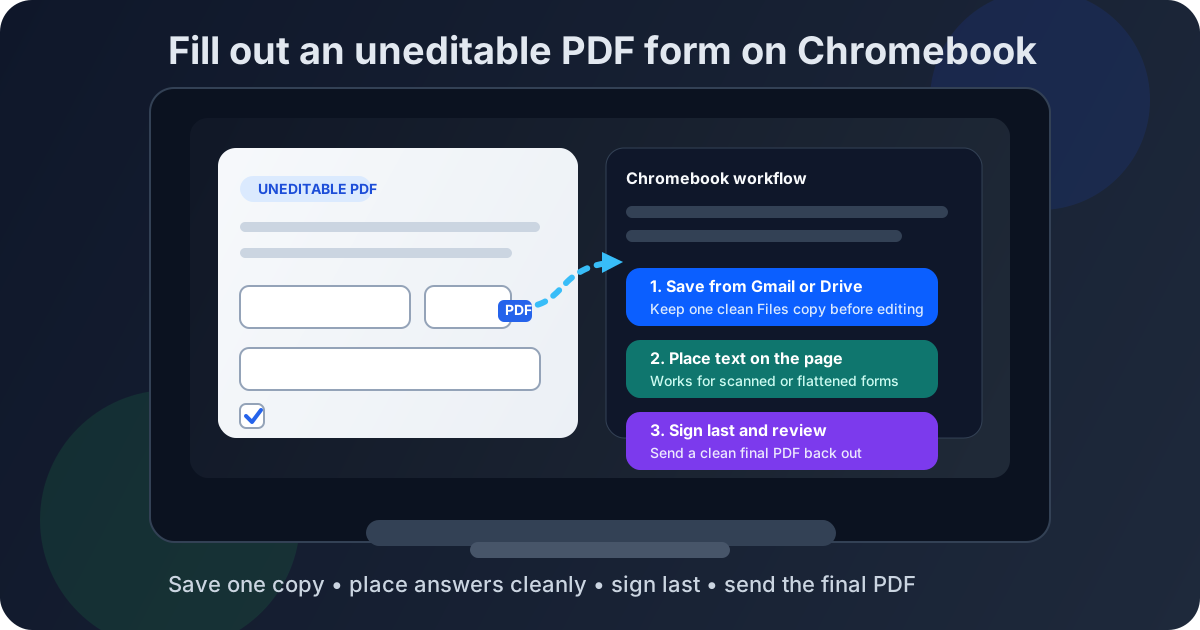
Table of contents
- Quick start: fill an uneditable PDF on Chromebook in 3 minutes
- Why a PDF form feels uneditable on Chromebook
- Step-by-step: complete the form from Gmail, Drive, or Files
- Best way to handle scanned, flattened, and secured PDFs
- ChromeOS viewer vs a dedicated browser workflow
- How to sign, save, and send the final copy
- Common Chromebook mistakes that make forms look messy
- Related LifetimePDF tools for this workflow
- FAQ (People Also Ask)
Quick start: fill an uneditable PDF on Chromebook in 3 minutes
If you just need the shortest route from stubborn attachment to finished file, use this workflow:
- Save the exact PDF from Gmail, Google Drive, Downloads, or the Files app.
- Open PDF Form Filler in Chrome.
- Upload the file from Files or Drive.
- Place text manually where the original PDF refuses to accept typing.
- Add your signature with Sign PDF only after the rest of the form is complete.
- Download the finished copy, review it once at full zoom, then email or upload it.
Why a PDF form feels uneditable on Chromebook
The form usually is not broken in some mysterious way. Most ChromeOS PDF headaches come from one of four familiar situations:
1) You are looking at a preview, not working from the real file
Gmail, Drive, browsers, and shared portals can make a PDF look editable even when you have not saved the actual document yet. Working from one local Files or Drive copy avoids version mix-ups and confusing viewer behavior.
2) The PDF is scanned
A scanned PDF is mostly just page images. Blank lines and boxes may look interactive, but there are no true fields underneath, so clicking does nothing in ChromeOS viewers.
3) The PDF was flattened
Flattening merges the form layer into the page itself. That is common after someone already completed, printed, or exported the file once. The layout survives, but the editable fields do not.
4) The file has restrictions
Some PDFs open fine but block editing, comments, or signing. If you are authorized to work with the file, you may need PDF Unlock before you try the rest of the workflow.
Once you know which case you are dealing with, the fix becomes much more obvious. You either save the right local copy, place content manually, unlock the document, or run OCR when text recognition actually matters.
Step-by-step: complete the form from Gmail, Drive, or Files
This is the cleanest Chromebook workflow when the form looks normal but refuses to cooperate.
1) Save the exact PDF you plan to return
Do not work from a floating Gmail or Drive preview if you can avoid it. Save the attachment to Downloads, Google Drive, or another obvious folder in Files. That one habit prevents a lot of mistakes, especially when the same form shows up twice in an email thread or shared Drive folder.
2) Open the form filler in Chrome
Go to PDF Form Filler and upload the local file. A dedicated browser workflow is usually faster than trying to force the built-in viewer to behave like a real editor.
3) Upload from Files or Drive
Pull the PDF from wherever ChromeOS saved it: Downloads, a Gmail attachment, a Google Drive folder, or another Files location. If you have several copies with similar names, rename the one you want before uploading so you do not accidentally return yesterday's version.
4) Fill the document in short passes
Start with names, dates, IDs, and short text boxes first. Then add checkmarks, initials, and smaller notes. On Chromebook, this usually keeps your spacing cleaner because you are not bouncing randomly around the page. If the form turns out to be truly fillable, great. If it is dead underneath, place your text where it belongs and keep moving.
5) Review before you sign
Zoom in once before adding the signature. This is where you catch answers that sit slightly too high, dates that landed outside a box, or fields that need one more line break. Signing too early is the easiest way to create extra cleanup work later.
Best way to handle scanned, flattened, and secured PDFs
These three cases look similar from the outside, but the best fix is slightly different in each one.
Scanned PDFs
If you cannot select text, search for a word, or place the cursor in any box, the file probably behaves like an image. The fastest answer is usually to place text on top of the page and finish the form. If you also need searchable text for records, extraction, or reuse, run OCR PDF first.
Flattened PDFs
Flattened forms are common with school packets, healthcare intake documents, HR paperwork, and anything that has already been processed once. They often look polished but will not accept typing. In that case, treat the page like a background template and overlay your answers cleanly.
Secured or locked PDFs
If the viewer tells you editing is restricted, comments are blocked, or the file is protected, use PDF Unlock only when you are authorized to edit the document. Unlocking helps when permissions are the obstacle. It does not create form fields inside a scan that never had them.
ChromeOS viewer vs a dedicated browser workflow
The built-in viewer is still useful on Chromebook, just not for every part of this job.
| Tool | Best use | Where it struggles |
|---|---|---|
| ChromeOS PDF viewer | Reading the PDF, checking page order, and reviewing the final output | Dead fields, scanned forms, and flattened documents that never become editable |
| Chrome with PDF Form Filler | Typing, placing text, handling stubborn forms, and saving a clean finished copy | You still need one final visual review before sending |
| Gmail or Drive preview | Quickly seeing what the sender sent | Version confusion and false confidence that you are editing the real file |
The simplest Chromebook mindset is this: use previews to inspect and review, but use a dedicated form-filling workflow when the file itself is the problem.
How to sign, save, and send the final copy
Finishing neatly matters just as much as filling the form. This is the part that determines whether the returned PDF looks professional.
Add the signature last
Use Sign PDF after the rest of the form is stable. That way you are not moving a signature around every time you fix spacing, initials, or a checkbox.
Save the file with a useful name
Rename the final copy so it is obvious what it is. Something like enrollment-form-jordan-signed.pdf or intake-form-final.pdf is much better than sending back scan_0047(1).pdf.
Review at full zoom once
Open the downloaded PDF in ChromeOS or Drive and zoom in enough to catch line placement, dates, initials, and signatures. One review pass is usually enough if you filled the form in clean sections.
Compress or protect when needed
If the finished file is too large for email or a portal, use Compress PDF. If it contains sensitive information and you need to reduce accidental edits, use Protect PDF before sending.
Common Chromebook mistakes that make forms look messy
- Editing the wrong copy: the preview in Gmail or Drive is not always the same file you later attach or upload.
- Fighting dead fields too long: if the blanks never become interactive, switch to manual text placement instead of retrying the same click.
- Signing too early: signatures should come after the main answers, not before them.
- Skipping the final zoomed review: one close pass catches misaligned dates, clipped text, and small checkbox mistakes.
- Sending giant scanned files: compress them when necessary instead of hoping the recipient's portal accepts a huge upload.
Related LifetimePDF tools for this workflow
PDF Unlock
Remove editing restrictions when you are authorized to change the document.
Open PDF UnlockOCR PDF
Useful when a scanned form needs a searchable text layer before or after completion.
Open OCR PDFCompress PDF
Shrink oversized scans and final forms before emailing or portal upload.
Open Compress PDFProtect PDF
Add protection to the finished copy before sharing sensitive information.
Open Protect PDFFAQ (People Also Ask)
How do I fill out an uneditable PDF form on Chromebook?
Save the PDF locally or in Drive, upload it into a browser-based PDF form filler in Chrome, then place text, checkmarks, and signatures directly on top of the page where the original PDF will not let you type.
Why will a PDF not let me type on Chromebook?
The file is usually scanned, flattened, or permission-restricted. That means the boxes you see are either not real fields or editing is blocked, so you need a form filler, an unlock step, or OCR depending on the file.
Should I use OCR before filling out an uneditable PDF form on Chromebook?
Only when you need selectable or searchable text. If your goal is simply to complete and return the form, manual text placement is often faster than OCR.
Can I do this from a Gmail attachment?
Yes, but it is safer to save the attachment first and work from one local copy. That helps you avoid preview quirks and version confusion.
How do I keep the completed PDF from shifting when someone else opens it?
Fill the content first, sign last, review the downloaded copy at full zoom, and protect or flatten the final PDF if needed before sending. That reduces layout surprises and accidental edits.
Published by LifetimePDF - Pay once. Use forever.